DIY Gaming PC Maintenance: 7 Steps to Keep Your Rig Running Optimally Through 2026
As the digital realms of 2026 continue to evolve with breathtaking graphics and immersive gameplay, the stalwart machine at the heart of your gaming experience – your gaming PC – demands more than just a passing glance. It requires diligent care, regular attention, and a proactive approach to maintenance. Neglecting your rig can lead to frustrating performance drops, system instability, and even costly hardware failures. But fear not, fellow gamer! Embarking on a journey of DIY Gaming PC Maintenance is not only empowering but also surprisingly straightforward. This comprehensive guide will walk you through seven essential steps to ensure your gaming rig remains a finely tuned, high-performance beast, ready to conquer any virtual challenge thrown its way, not just today, but well into the future.
Think of your gaming PC as a high-performance sports car. You wouldn’t expect it to run perfectly without regular oil changes, tire rotations, and general upkeep, would you? The same principle applies to your computer. Dust accumulation, outdated drivers, fragmented storage, and inefficient software can all conspire to degrade performance, reduce lifespan, and ultimately diminish your gaming pleasure. By dedicating a few hours every couple of months to these crucial Gaming PC Maintenance tasks, you’ll not only preserve your investment but also unlock its full potential, ensuring buttery-smooth frame rates and lightning-fast load times.
This article is designed for both seasoned PC enthusiasts and newcomers alike. We’ll break down complex procedures into easy-to-follow instructions, highlight necessary tools, and provide valuable insights to help you understand the ‘why’ behind each step. So, grab your anti-static wrist strap, fire up your favourite playlist, and let’s dive into the world of optimal Gaming PC Maintenance!
Step 1: The Essential Dust Buster – Physical Cleaning
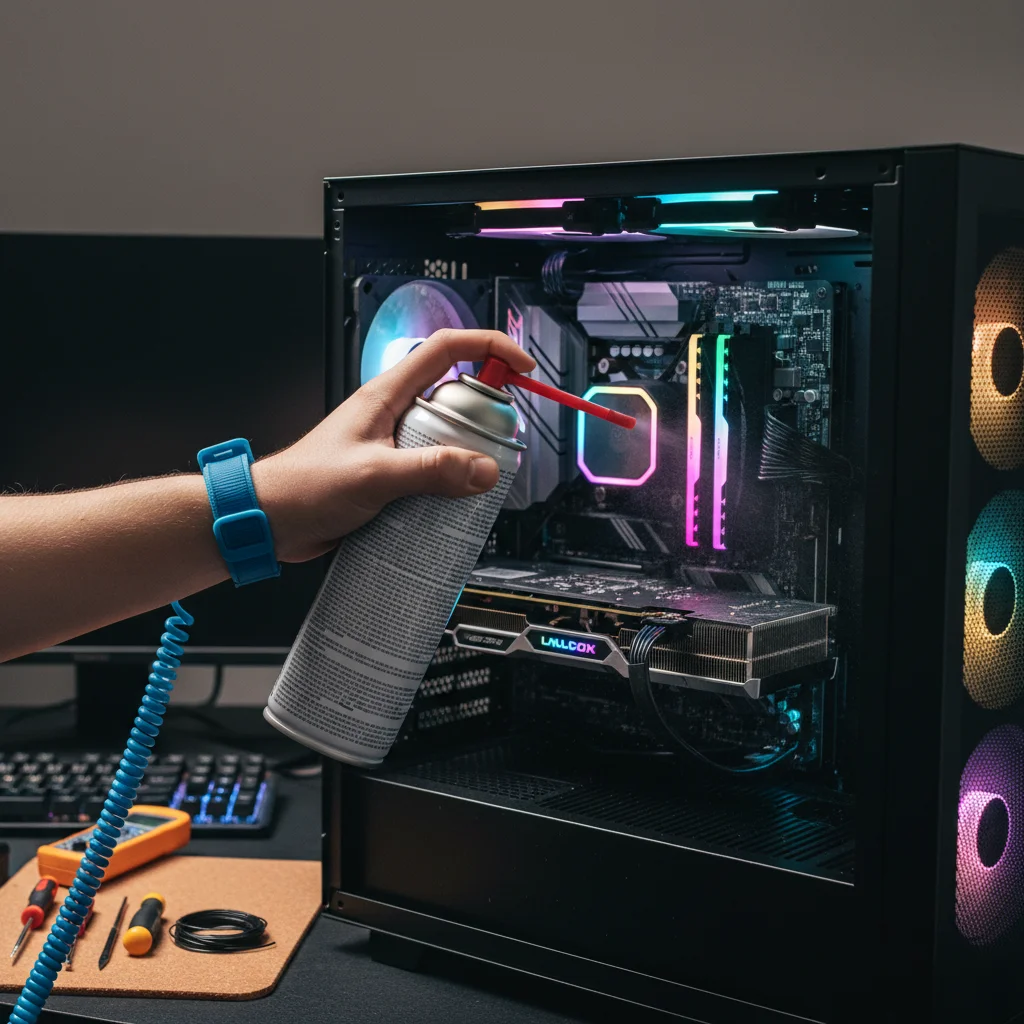
Dust is the silent killer of PC performance and longevity. It acts as an insulator, trapping heat within your components, leading to higher temperatures, reduced efficiency, and a shorter lifespan for your precious hardware. Regular physical cleaning is the cornerstone of effective Gaming PC Maintenance.
Tools You’ll Need:
- Compressed Air Can: Essential for blasting dust out of tight spaces.
- Microfiber Cloths: For wiping down surfaces without scratching.
- Anti-Static Wrist Strap: Crucial for preventing electrostatic discharge (ESD) which can damage components.
- Small Soft Brush (e.g., a clean paintbrush): For gently dislodging stubborn dust.
- Screwdriver Set: To open your PC case.
- Isopropyl Alcohol (90% or higher) and Cotton Swabs: For cleaning thermal paste residue (if reapplying) or stubborn grime.
The Cleaning Process:
- Power Down and Unplug: This is paramount. Turn off your PC completely, then unplug it from the wall. Disconnect all peripherals.
- Move to a Well-Ventilated Area: Preferably outdoors or in a garage, as dust can get everywhere.
- Open Your PC Case: Carefully remove the side panel(s) of your case. Refer to your case manual if unsure.
- Ground Yourself: Attach your anti-static wrist strap to an unpainted metal part of your PC case.
- Dust the Fans: Hold the fan blades in place with your finger while blasting them with compressed air. This prevents them from spinning too fast and potentially damaging the bearings. Clean CPU cooler fans, GPU fans, and case fans.
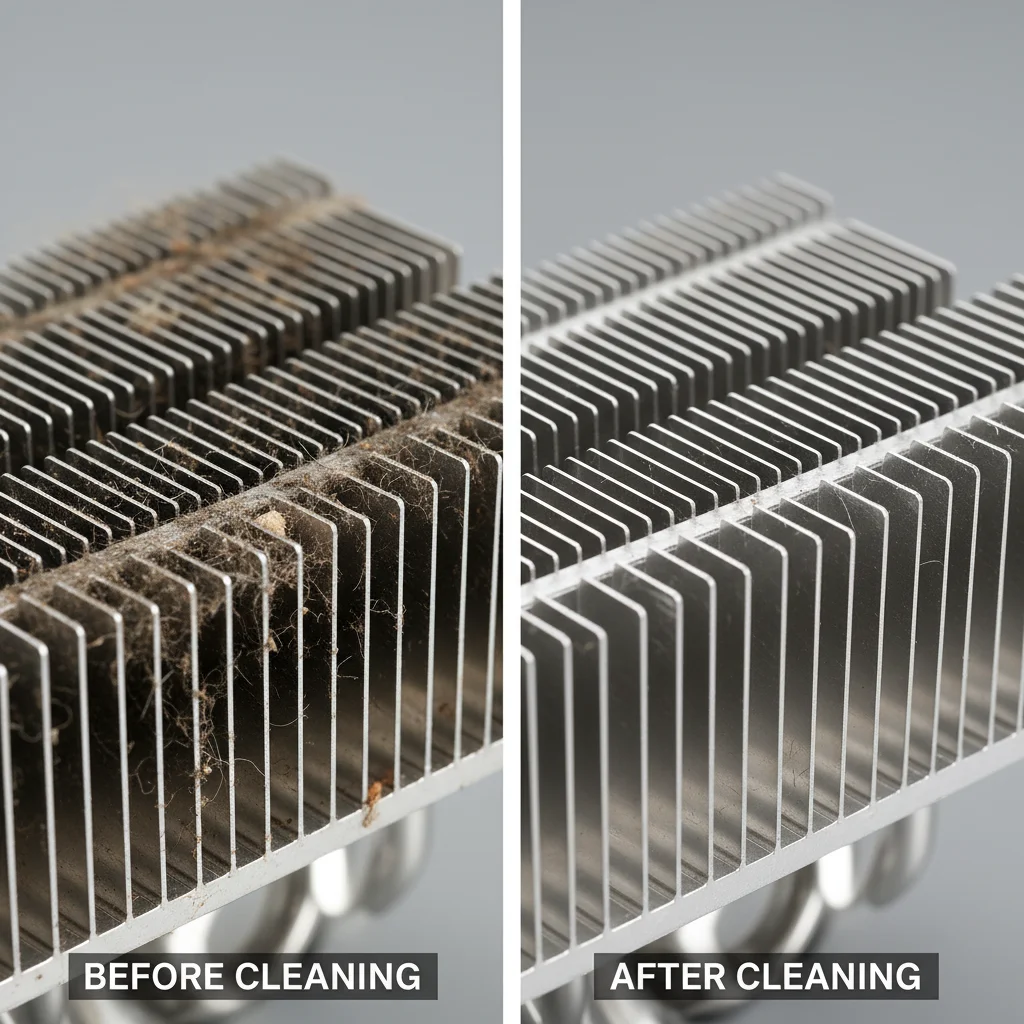
- Clean Radiators and Heatsinks: These are notorious dust traps. Use compressed air to blow dust out of the fins. For very stubborn dust, a soft brush can help.
- Graphics Card Cleaning: Gently clean the shroud and fans of your GPU. If comfortable, and if your card allows, you might carefully remove the shroud for a more thorough clean of the heatsink fins underneath, but this is an advanced step.
- Motherboard and Components: Lightly spray compressed air across the motherboard, RAM sticks, and other components to remove surface dust. Be gentle and use short bursts. Avoid direct, prolonged blasts on sensitive components.
- Power Supply Unit (PSU): If your PSU has an external fan filter, clean that thoroughly. If the PSU fan is exposed internally, gently clean it with compressed air, ensuring you don’t over-spin the fan. Do NOT open the PSU – it can hold a dangerous electrical charge even when unplugged.
- Case Filters: Remove and thoroughly clean all case dust filters. Many are washable with water and mild soap; ensure they are completely dry before reinserting.
- Cable Management Check: While you’re in there, ensure cables aren’t obstructing airflow. Re-route if necessary.
- Exterior Wipe Down: Use a microfiber cloth to wipe down the exterior of your case, monitor, keyboard, and mouse.
Regular physical cleaning – ideally every 3-6 months depending on your environment – will dramatically improve your PC’s thermal performance and extend the life of its components. It’s the most impactful step in effective Gaming PC Maintenance.
Step 2: Software Spring Cleaning – Optimise Your Digital Environment
Physical cleanliness is only half the battle. Your operating system and installed software also require regular attention to maintain peak performance. A cluttered and unoptimized software environment can lead to slow boot times, application crashes, and reduced in-game frame rates.
Key Software Maintenance Tasks:
- Uninstall Unused Programmes: Go through your ‘Apps & Features’ (Windows) or ‘Applications’ (macOS) and uninstall any software you no longer use. These programmes can consume disk space, run background processes, and even slow down your system.
- Disable Startup Programmes: Many applications automatically launch with your operating system, unnecessarily consuming RAM and CPU cycles. Use Task Manager (Windows, ‘Startup’ tab) or System Preferences (macOS, ‘Users & Groups’ > ‘Login Items’) to disable non-essential startup items. Keep only vital programmes like antivirus software.
- Clean Up Temporary Files: Over time, your system accumulates temporary files, browser caches, and system logs that take up valuable disk space.
- Windows: Use the built-in ‘Disk Cleanup’ utility or navigate to ‘Settings’ > ‘System’ > ‘Storage’ > ‘Temporary files’ to remove these.
- macOS: Tools like CleanMyMac X (third-party) or manually clearing browser caches can help.
- Defragment Hard Drives (HDD only): If you still use traditional Hard Disk Drives (HDDs), defragmenting them regularly can improve file access speeds. SSDs (Solid State Drives) do NOT need defragmentation; in fact, it can reduce their lifespan.
- Browser Maintenance: Clear your browser’s cache, cookies, and history regularly. Consider uninstalling unused extensions, as they can consume resources and potentially compromise privacy.
- Run a Virus/Malware Scan: Even with real-time protection, a full system scan with your antivirus software (or a reputable anti-malware tool like Malwarebytes) every few weeks is good practice to catch anything that might have slipped through.
A lean, clean software environment ensures your system resources are dedicated to gaming, making this a critical aspect of effective Gaming PC Maintenance.
Step 3: Driver Updates – The Performance Power-Up
Drivers are the communication bridges between your operating system and your hardware components. Outdated drivers can lead to performance bottlenecks, compatibility issues, and even crashes, especially in new games. Keeping your drivers up-to-date is a simple yet powerful way to boost your gaming PC’s performance and stability.
Key Drivers to Update:
- Graphics Card Drivers (GPU): This is arguably the most critical driver for gamers. NVIDIA, AMD, and Intel frequently release new drivers that include performance optimisations for the latest games, bug fixes, and new features.
- NVIDIA: Use GeForce Experience.
- AMD: Use AMD Radeon Software Adrenalin Edition.
- Intel: Use Intel Driver & Support Assistant.
- Chipset Drivers: These drivers manage the communication between your CPU, motherboard, and other components. Visit your motherboard manufacturer’s website (e.g., ASUS, MSI, Gigabyte, ASRock) and download the latest chipset drivers for your specific motherboard model.
- Audio Drivers: While less impactful on gaming performance, updated audio drivers can resolve sound issues and improve audio quality. Check your motherboard manufacturer’s website or the website of your dedicated sound card.
- Network Drivers (Ethernet/Wi-Fi): Updated network drivers can improve connection stability and speed, crucial for online gaming. Again, check your motherboard manufacturer’s website.
Best Practices for Driver Updates:
- Download from Official Sources: Always download drivers directly from the manufacturer’s official website or their dedicated software (GeForce Experience, Radeon Software). Avoid third-party driver update utilities, as they can sometimes install incorrect or malicious software.
- Clean Installation: When updating GPU drivers, use the ‘Custom’ or ‘Clean Installation’ option if available. This removes old driver files, preventing potential conflicts.
- Restart After Updates: Always restart your PC after installing new drivers to ensure they are properly initialised.
Regularly checking for and installing driver updates is a proactive measure that ensures your hardware performs at its best, making it an indispensable part of Gaming PC Maintenance.
Step 4: Storage Health – SSD Optimisation and HDD Management
Your storage drives – whether SSDs or HDDs – are fundamental to your PC’s overall responsiveness. Slow or unhealthy storage can lead to frustratingly long load times, stuttering, and general system sluggishness. Proper storage management is a vital component of Gaming PC Maintenance.
Solid State Drives (SSDs):
- TRIM Command: Ensure TRIM is enabled for your SSDs. TRIM helps SSDs manage stored data more efficiently, preventing performance degradation over time. Windows enables TRIM by default, but you can verify it by running
fsutil behavior query disabledeletenotifyin Command Prompt (Admin). A result of 0 means TRIM is enabled. - Firmware Updates: Check your SSD manufacturer’s website for firmware updates. These can improve performance, stability, and longevity. Use the manufacturer’s dedicated utility for this (e.g., Samsung Magician, Crucial Storage Executive).
- Avoid Filling to Capacity: Try to keep at least 10-15% of your SSD free. SSDs perform best when they have some overhead for wear levelling and garbage collection.
- No Defragmentation: As mentioned, never defragment an SSD. It’s unnecessary and can reduce its lifespan.
Hard Disk Drives (HDDs):
- Defragmentation: Regularly defragment your HDDs. Windows has a built-in ‘Optimise Drives’ tool that can schedule defragmentation.
- Error Checking: Periodically run error checking (CHKDSK) on your HDDs to scan for and fix file system errors. Right-click the drive in ‘This PC’, go to ‘Properties’ > ‘Tools’ > ‘Check’.
- Monitor Health: Use tools like CrystalDiskInfo to monitor the S.M.A.R.T. (Self-Monitoring, Analysis, and Reporting Technology) status of your HDDs. This can provide early warnings of impending drive failure.
General Storage Tips:
- Organise Files: Keep your game library and important files organised. Delete old game installations you no longer play.
- Cloud Storage/External Drives: Consider offloading less frequently accessed files or backups to cloud storage or external hard drives to free up space on your primary gaming drives.
Maintaining healthy storage ensures your games load quickly and your system remains responsive, making it a critical aspect of ongoing Gaming PC Maintenance.
Step 5: Thermal Management – Keeping Your Cool
Heat is the enemy of electronic components. Excessive heat can lead to thermal throttling (where components reduce their clock speed to prevent overheating), instability, and premature hardware failure. Effective thermal management is paramount for consistent gaming performance and is a core pillar of Gaming PC Maintenance.
Key Thermal Management Practices:
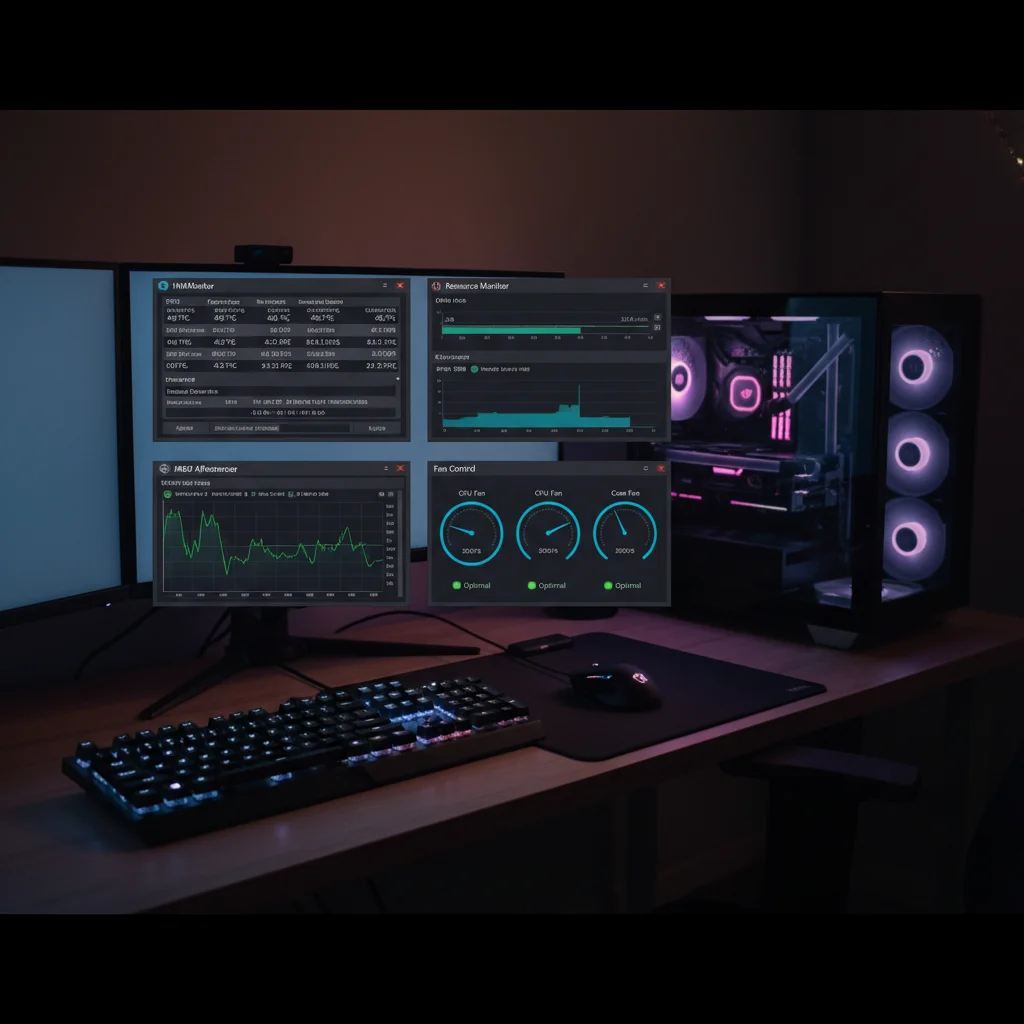
- Monitor Temperatures: Regularly monitor your CPU and GPU temperatures, especially during gaming sessions. Tools like HWMonitor, MSI Afterburner, or NZXT CAM are excellent for this.
- CPU Idle Temps: 30-45°C
- CPU Load Temps: 60-80°C (up to 90°C is generally safe for short bursts, but lower is better)
- GPU Idle Temps: 30-50°C
- GPU Load Temps: 60-85°C (some high-end cards run hotter, but consistently above 90°C is a concern)
- Optimise Case Airflow: Ensure your PC case has a balanced airflow configuration. Generally, you want positive pressure (more intake fans than exhaust) to keep dust out. Ensure intake fans are drawing in cool air and exhaust fans are expelling hot air efficiently.
- Fan Curves: Adjust your fan curves in your motherboard’s BIOS/UEFI or using software utilities (e.g., Fan Control, MSI Afterburner, ASUS AI Suite). This allows fans to ramp up speed as temperatures rise, providing better cooling when needed.
- Reapply Thermal Paste (Advanced): Over time, the thermal paste between your CPU/GPU and their respective heatsinks can dry out and become less effective. Reapplying fresh thermal paste every 2-3 years can significantly improve heat transfer. This is an advanced step and requires careful execution.
- Cable Management: Poor cable management can obstruct airflow within your case. Route cables neatly behind the motherboard tray or out of the direct path of airflow.
- Clean Dust Filters: As mentioned in Step 1, regularly clean your case’s dust filters to ensure maximum airflow.
- Ambient Room Temperature: A cooler room will naturally lead to cooler PC components. Ensure your PC isn’t crammed into a tight space without adequate ventilation.
Proactive thermal management prevents throttling and extends component life, making it an indispensable part of Gaming PC Maintenance.
Step 6: Power Management – Efficiency and Stability
Proper power management is not just about saving electricity; it’s about ensuring your components receive stable power and operate efficiently. Incorrect power settings or an overloaded power supply can lead to instability, crashes, and reduced performance.
Key Power Management Tips:
- High Performance Power Plan: In Windows, ensure your power plan is set to ‘High Performance’ or ‘Ultimate Performance’ when gaming. This prevents your CPU from downclocking to save power, ensuring it delivers maximum performance. You can find this in ‘Control Panel’ > ‘Hardware and Sound’ > ‘Power Options’.
- Check PSU Wattage: Ensure your Power Supply Unit (PSU) has sufficient wattage for all your components, especially if you’ve upgraded your GPU or CPU. A PSU calculator can help determine the required wattage. An underpowered PSU can lead to system instability and random shutdowns.
- UPS (Uninterruptible Power Supply): Consider investing in a UPS. This provides surge protection and a battery backup, protecting your PC from power fluctuations, brownouts, and blackouts – which can cause data corruption or hardware damage.
- Clean Power: Avoid plugging your PC into overloaded power strips with many other high-draw devices. Use a quality surge protector at the very least.
- Monitor Power Consumption: While less common for DIY users, some advanced motherboards and software allow you to monitor power consumption for individual components. This can help identify inefficient hardware or power-hungry processes.
Optimising power settings and ensuring a stable power supply contributes significantly to the reliability and consistent performance of your gaming rig, solidifying its place in effective Gaming PC Maintenance.
Step 7: Regular Backups & System Restore Points – Your Digital Safety Net
Even with the most meticulous Gaming PC Maintenance, unforeseen issues can arise. Hardware can fail, software can become corrupted, or a faulty driver update can render your system unbootable. Having recent backups and system restore points is your ultimate safety net, allowing you to recover quickly from disaster.
Key Backup and Recovery Practices:
- Create System Restore Points: Windows automatically creates restore points, but it’s good practice to manually create one before installing new drivers, major software, or making significant system changes. This allows you to roll back your system to a previous working state without losing personal files.
- Windows: Search for ‘Create a restore point’ in the Start menu.
- Regular Data Backups: Your personal files (game saves, documents, photos, videos) are often irreplaceable. Implement a regular backup strategy:
- Cloud Storage: Services like Google Drive, OneDrive, Dropbox, or iCloud offer convenient cloud backup.
- External Hard Drive: A reliable external HDD or SSD is excellent for full system image backups or simply copying important files.
- Network Attached Storage (NAS): For more advanced users, a NAS provides a centralised, robust backup solution for multiple devices.
- Full System Image Backup (Recommended): Periodically create a full system image backup. This is a complete snapshot of your operating system, applications, and files. If your main drive fails, you can restore this image to a new drive and be up and running exactly as before.
- Windows: Use the built-in ‘Backup and Restore (Windows 7)’ utility (still available in Windows 10/11) or third-party imaging software like Macrium Reflect Free.
- Keep Installation Media Handy: Have your Windows installation media (USB drive or DVD) readily available. This is crucial for troubleshooting boot issues or performing a clean OS reinstallation if necessary.
By implementing a robust backup and recovery strategy, you protect your valuable data and minimise downtime, ensuring that any hiccup in your gaming journey is merely a minor inconvenience rather than a catastrophic loss. This final step is paramount for comprehensive Gaming PC Maintenance.
Beyond the 7 Steps: Advanced Tips for Longevity and Performance
While the seven core steps form the bedrock of excellent Gaming PC Maintenance, there are several advanced practices that can further enhance your rig’s performance and extend its lifespan:
Overclocking Management:
If you’re an overclocker, regular monitoring of temperatures and stability is even more critical. Re-test your overclocks after major driver updates or system changes. Ensure your cooling solution can adequately handle the increased heat generated by overclocked components.
BIOS/UEFI Updates:
Motherboard BIOS/UEFI updates can sometimes improve system stability, add support for newer hardware, or fix critical bugs. However, BIOS updates carry a small risk, so only perform them if necessary and follow the manufacturer’s instructions precisely. A power outage during a BIOS update can brick your motherboard.
Cable Management Refinement:
Continuously look for ways to improve cable management. Better airflow isn’t just about fans; it’s about unobstructed pathways for air to move through your case. Zip ties, Velcro straps, and modular power supplies are your friends here.
Component Upgrades:
While not strictly ‘maintenance,’ planning future upgrades is part of keeping your PC relevant. Monitor component prices, new releases, and your own performance needs. A well-timed upgrade (e.g., more RAM, a faster SSD, or a new GPU) can breathe new life into an aging system and is an extension of future-proofing your Gaming PC Maintenance strategy.
Monitor Peripherals:
Don’t forget your gaming peripherals! Keep your keyboard clean (especially mechanical keyboards), clean your mouse sensor, and ensure your headset is functioning correctly. A clean and functional peripheral setup enhances the overall gaming experience.
Network Optimisation:
For online gamers, network performance is key. Ensure your router firmware is updated, use a wired Ethernet connection whenever possible, and consider Quality of Service (QoS) settings on your router to prioritise gaming traffic.
Conclusion: The Reward of Diligent Gaming PC Maintenance
The world of PC gaming is a thrilling one, constantly pushing the boundaries of technology and immersion. To fully enjoy this experience, your gaming rig needs to be a reliable, high-performing companion. By committing to these seven essential steps of DIY Gaming PC Maintenance – from diligent physical cleaning and software optimisation to proactive driver updates and robust backup strategies – you’re not just preserving hardware; you’re safeguarding your investment, ensuring consistent performance, and guaranteeing countless hours of uninterrupted gaming pleasure.
Remember, a little effort goes a long way. Regular, proactive maintenance prevents small issues from escalating into major problems. Your gaming PC works hard for you, rendering complex worlds and executing commands at lightning speed. Return the favour by giving it the care it deserves. Embrace these practices, and your powerful machine will continue to deliver optimal performance, stability, and reliability, ready to tackle the most demanding titles of 2026 and beyond. Happy gaming!
